Is it a hassle to set up the infrastructure for a new website every time you need to run a short-term project, such as a marketing campaign or just for testing? Do you spend too much on resources that are only used for a short period? Look no further, because automation is here to save the day!
By automating the process of setting up the infrastructure and configuring it to host your application, you can save time, reduce errors, and make it cost-effective. The goal is to spin up a platform to host a website with just a click of a button for a one-off campaign or a recurring event.
In this post, we discuss the advantages of automating infrastructure provisioning and configuration through an example to create a platform, which you can customize to suit your needs. Let’s get started!
Target setup
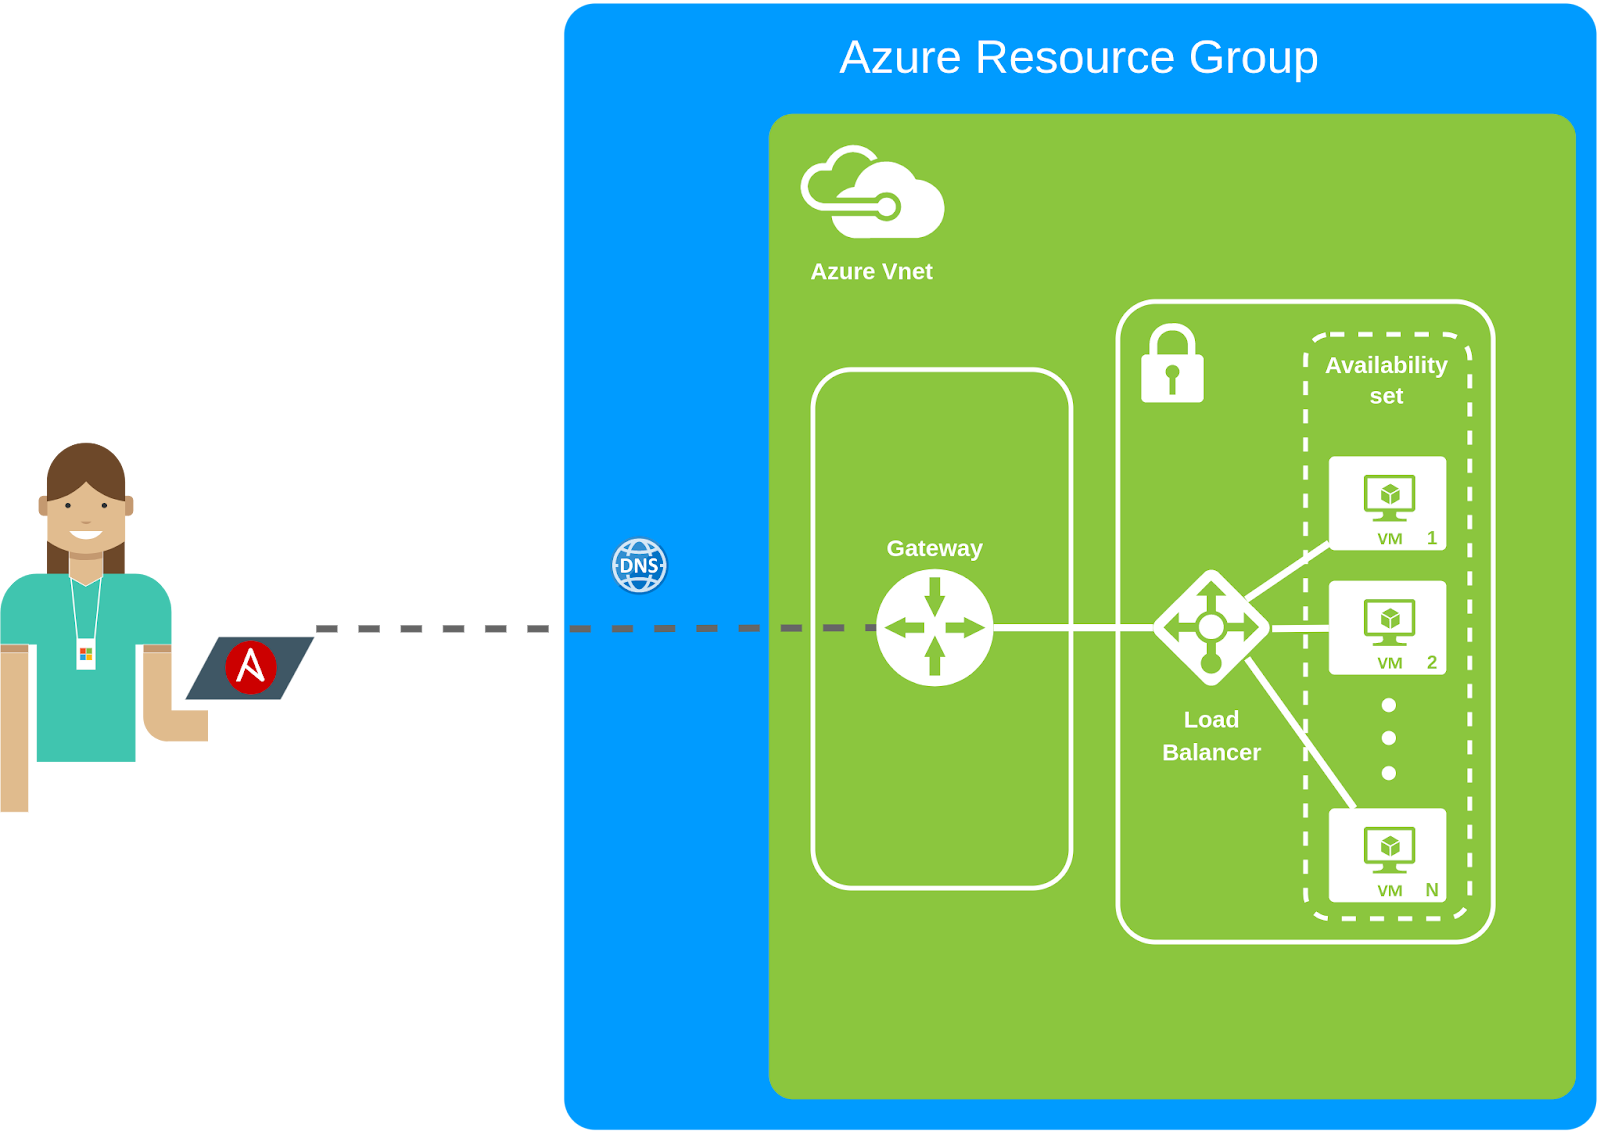
For the availability of our website, we intend to implement a two-tier software architecture consisting of a few virtual machines (VM) with a load balancer in front of them. The first tier will be the client interface or presentation layer, while the second tier are VMs running the web application and database. For a more scalable deployment, you could consider an N-tier design where we don’t host a web application frontend and backend database on the same machines. For additional information on design options, please refer to Deployment Archetypes for Cloud Applications.
We have chosen Microsoft Azure as our cloud provider, but if you prefer, you may also run this example on AWS.
Before we proceed with creating the VMs, we need to make the following logical resources available on Azure:
- A resource group that groups all the project resources.
- An availability set for VM redundancy and availability.
- A virtual network for communication between VMs and the internet.
- A subnet to allocate private IP addresses.
- A security group to filter network traffic.
- Public IP addresses.
- Network interfaces for the VMs and load balancer.
The following is a diagram of the target setup with all the pieces together.
Writing a playbook
Different options are available for provisioning and managing cloud resources:
- One option is to manually navigate through the web console of the cloud provider each time.
- Another option is to create a template specific to the cloud provider, such as Azure Resource Manager templates or AWS CloudFormation.
- Or use a domain-specific language such as Azure Bicep or define your AWS cloud infrastructure as code with the AWS Cloud Development Kit (AWS CDK).
- Alternatively, you can use Ansible or Terraform and ensure that resources are available when needed and removed when not in use.
|
ℹ️ Confused on where Terraform and Ansible fit together? Consider reading this blog post on Ansible vs. Terraform Demystified |
In this opportunity, we run an Ansible Playbook to streamline installing and configuring software in the virtual machines the playbook creates in Azure.
For a similar example in AWS, please refer to the article titled “How to consistently run temporary workloads on AWS and save money“.
Creating cloud resources on Azure
To prevent duplication, we use idempotent Ansible modules when creating Azure resources. We source these modules from the Ansible Content Collection for Azure.
|
ℹ️Idempotency: An operation is idempotent if the result of performing it once is exactly the same as the result of performing it repeatedly without any intervening actions. [Ansible Glossary] |
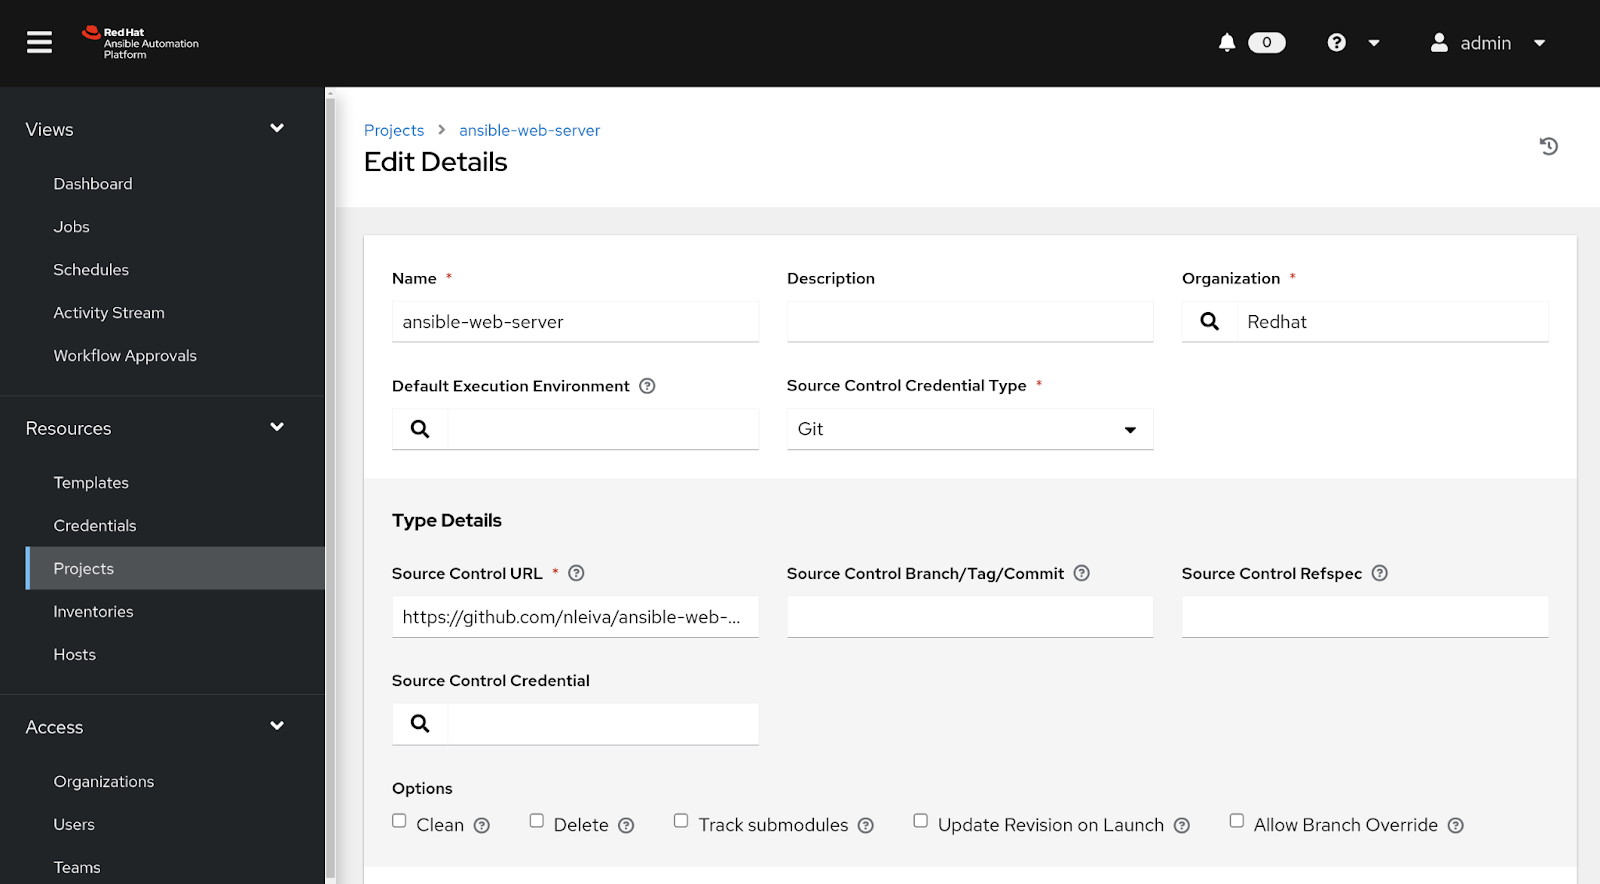
You can access the final playbook in this repository: https://github.com/nleiva/ansible-web-server.
Setting up the project
Ansible automates all tasks through a playbook that describes the sequential steps. The playbook in the repository can either:
- Create resources: Provision any number of virtual machines behind a load balancer.
- Delete resources: Destroy all resources previously created.
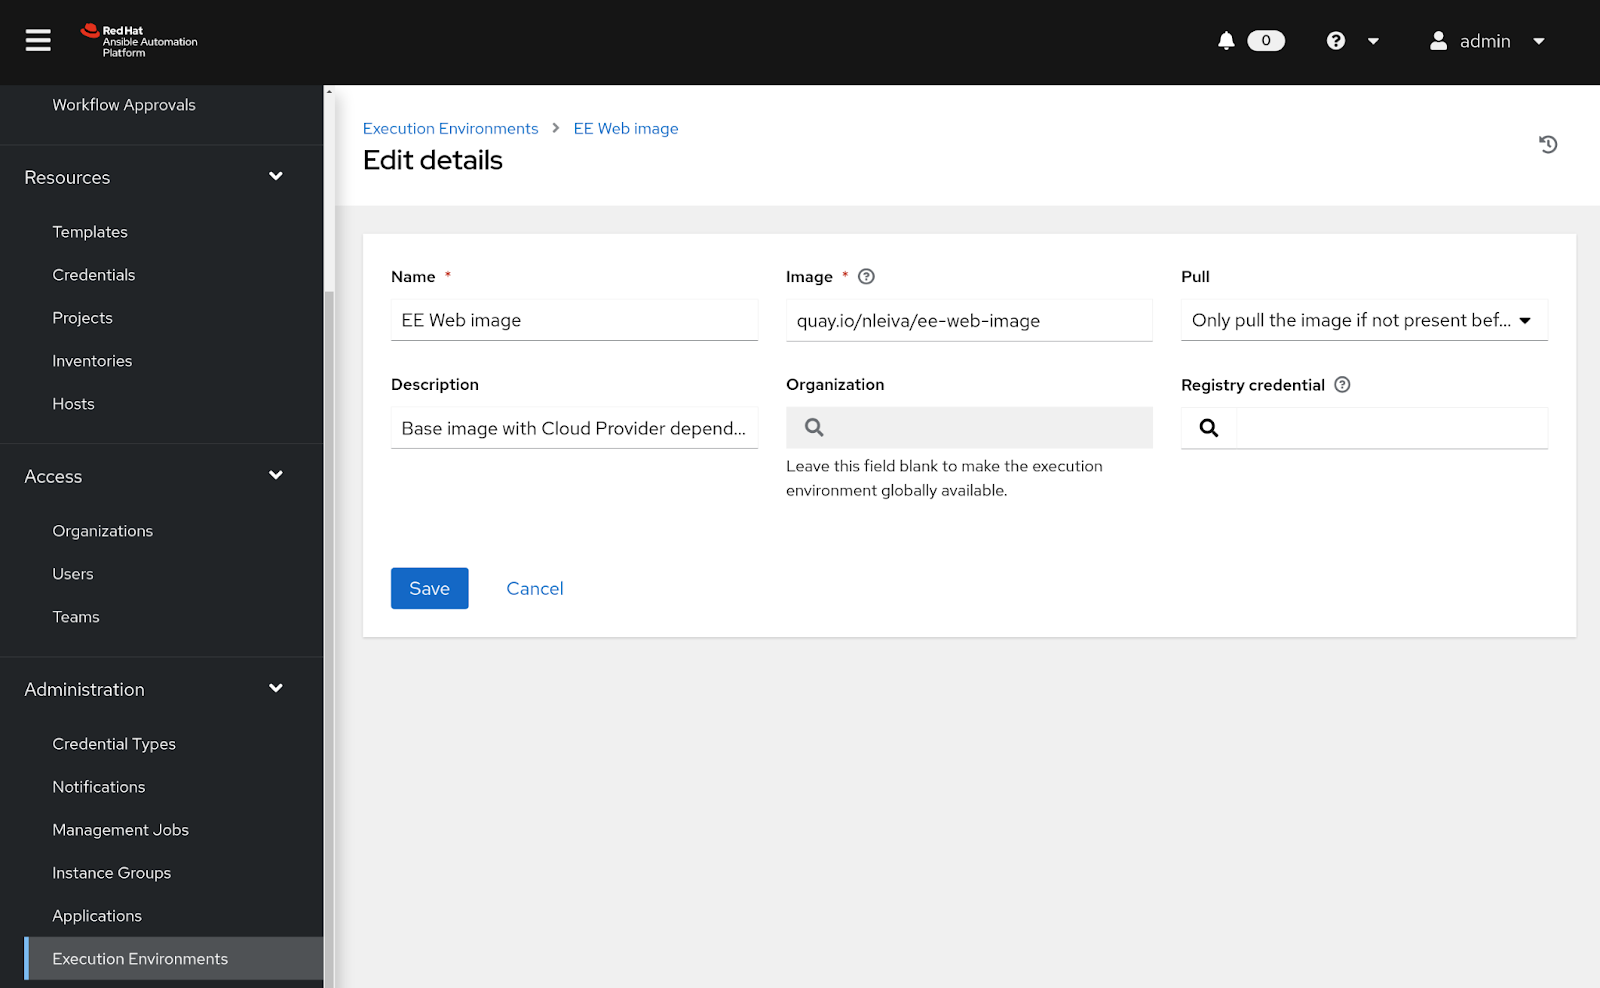
In Red Hat Ansible Automation Platform, go ahead and create a project pointing to this repository https://github.com/nleiva/ansible-web-server.
Connecting to Azure
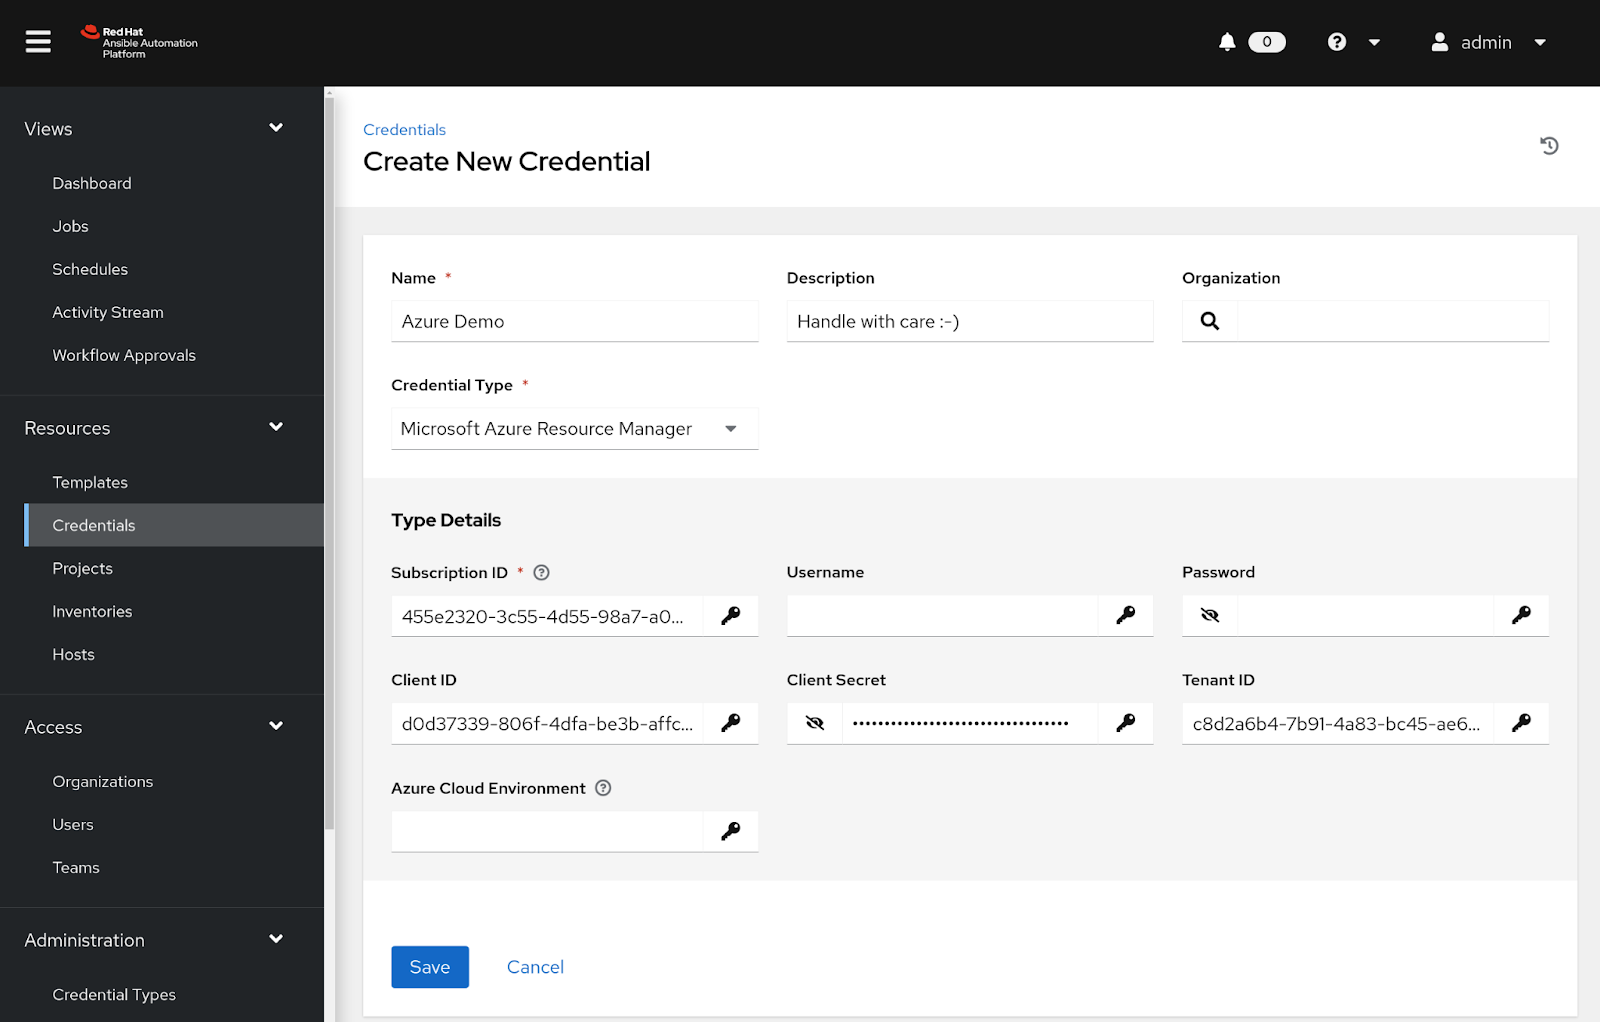
To connect to Azure, the Ansible Playbook requires access to your Azure account. In order to authenticate, provide the following variables:
- Subscription ID: subscription_id (AZURE_SUBSCRIPTION_ID)
- Client ID: client_id (AZURE_CLIENT_ID)
- Client secret: secret (AZURE_SECRET)
- Tenant ID: tenant (AZURE_TENANT)
You can conveniently store them as a Microsoft Azure Resource Manager credential in Ansible Automation Platform.
You can get these values from your Azure account by following these steps:
- Find your Azure subscription and AD tenant.
- Register an application with Azure AD and create a service principal.
- Create a new application secret.
Check out these screenshots for reference.
Launching the environment
Set up a job template in Ansible Automation Platform pointing to the project and credentials created.
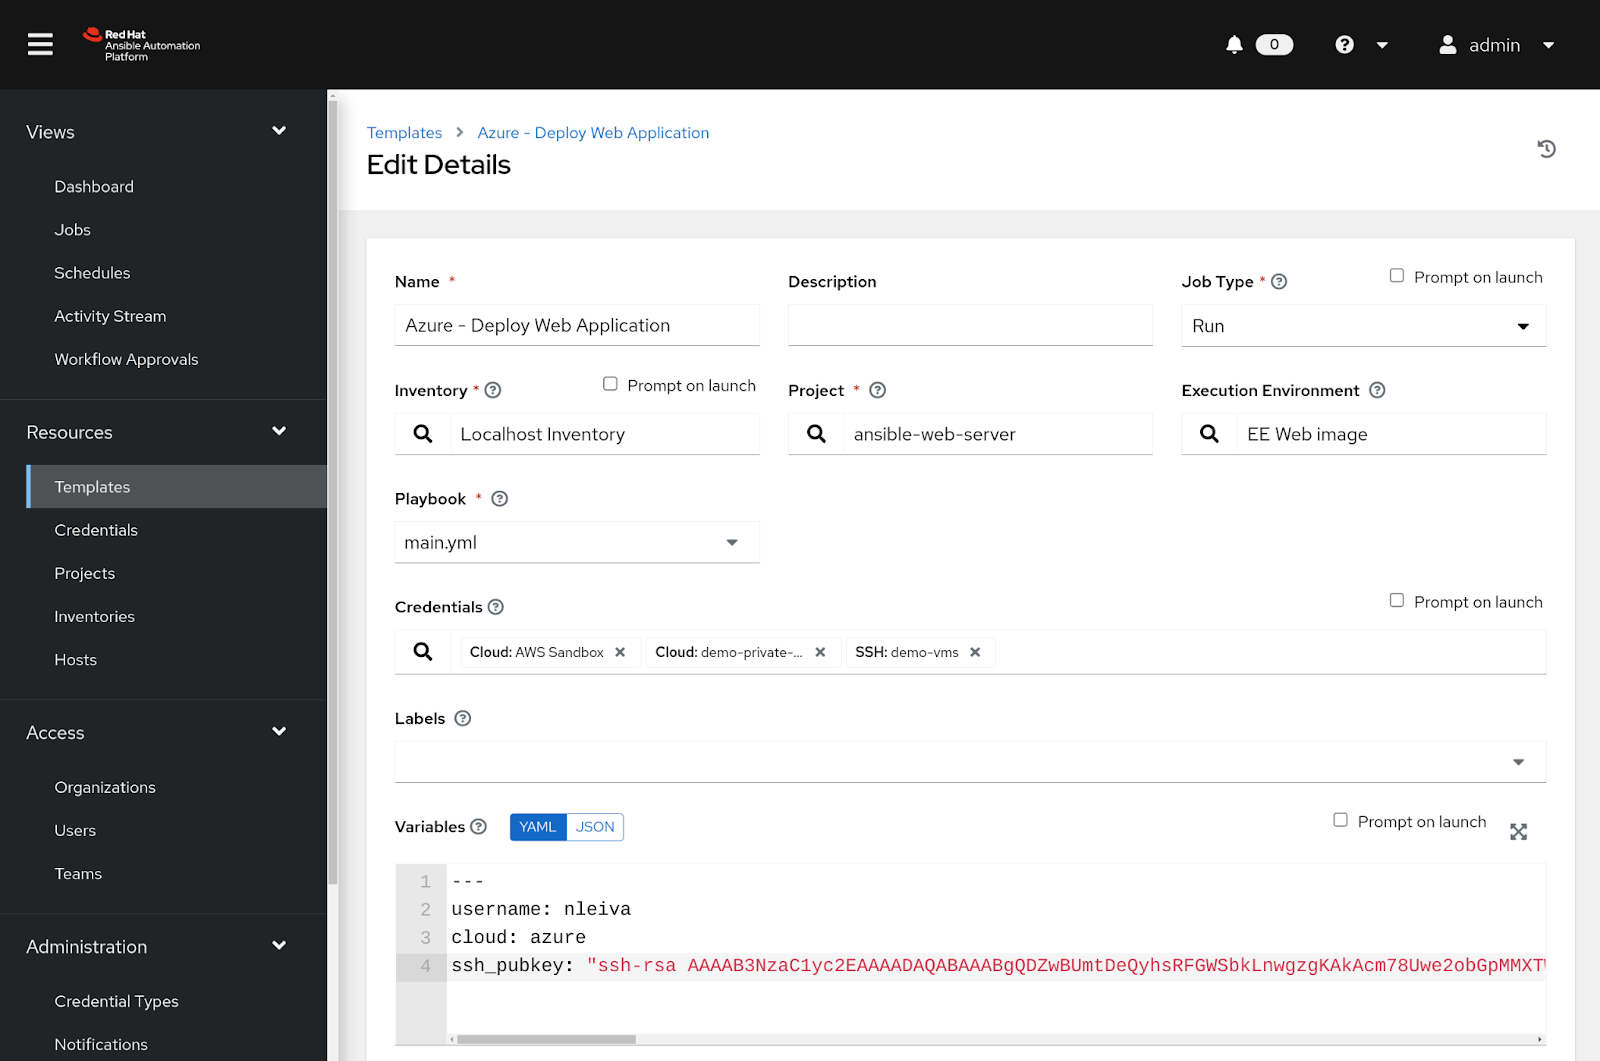
You can change the number and operating system of the backend servers via the variable vms. We set the default value in the vms.yml file in the vars folder of the repository. It lists two instances; one running centos, and the other one ubuntu. You can override this with a new vms definition as an Extra Variable. These instances are typically identical to one another, but in the example, we run them as a mix of different Linux distributions (just for fun).
vms:
1: centos
2: ubuntu
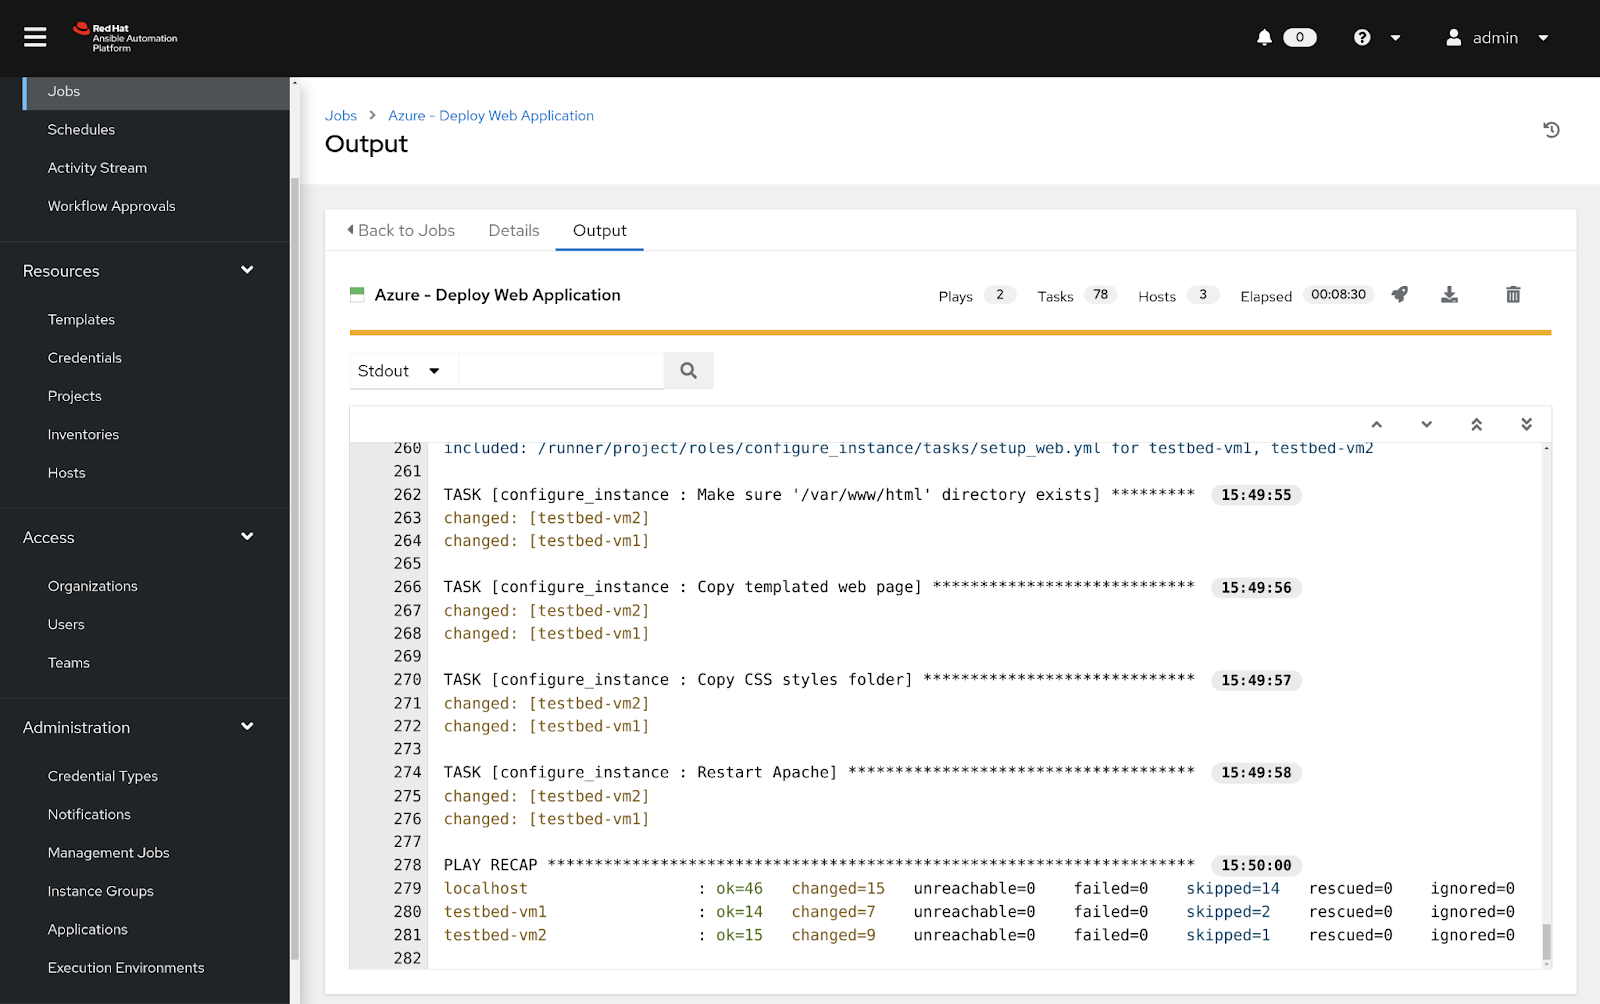
To make sure the execution is consistent over time regardless of the host it is running from, we take advantage of an automation execution environment.
Now you are ready to launch this job template. Wait a couple of minutes while the load balancer and VM(s) are being provisioned and Ansible installs software as required. The output will look like this:
Accessing the website
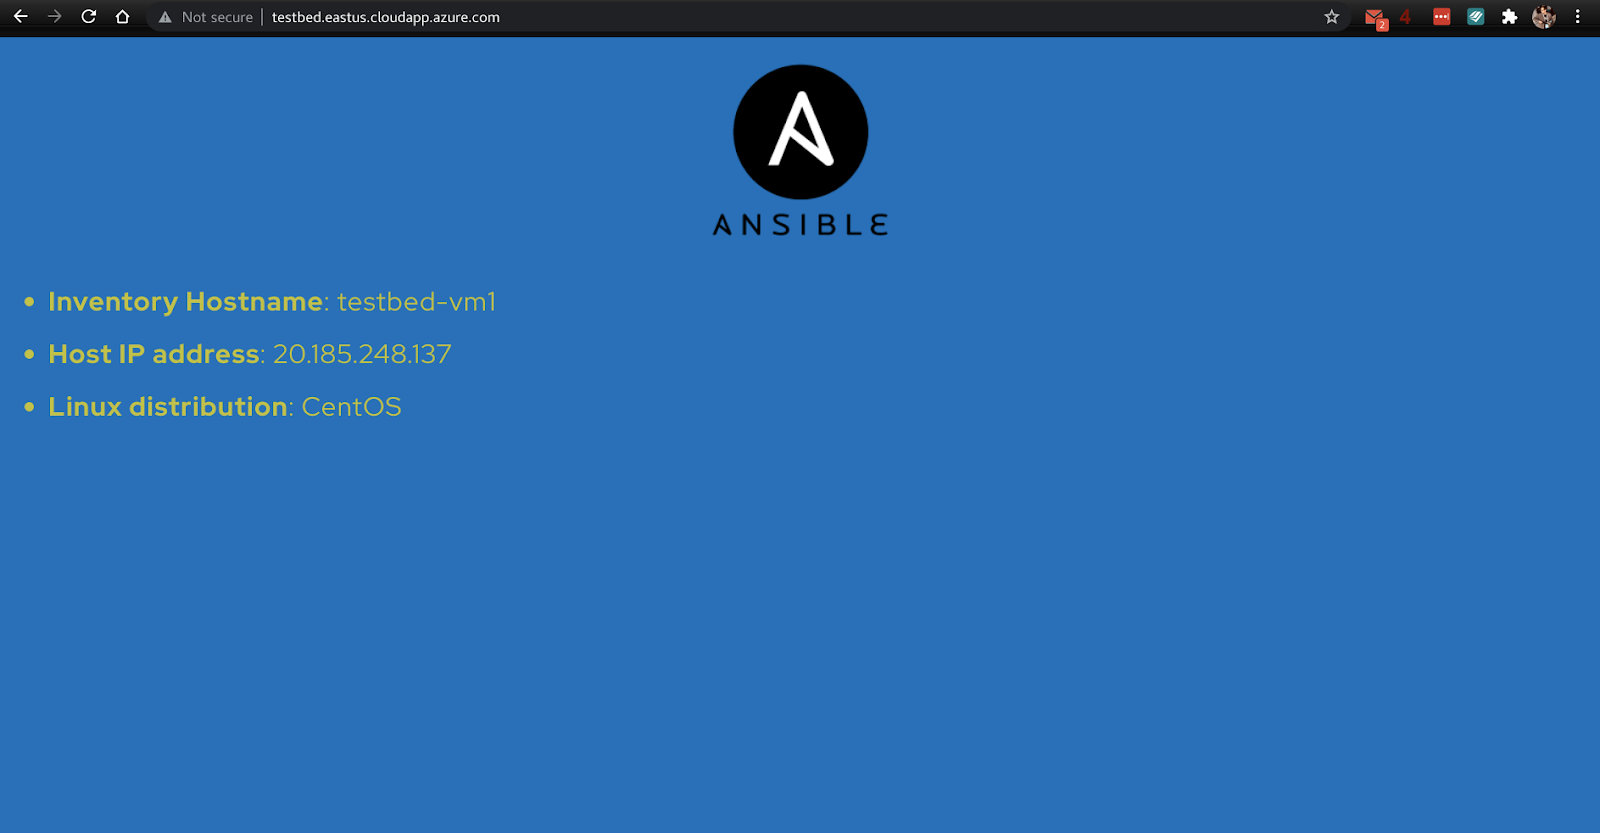
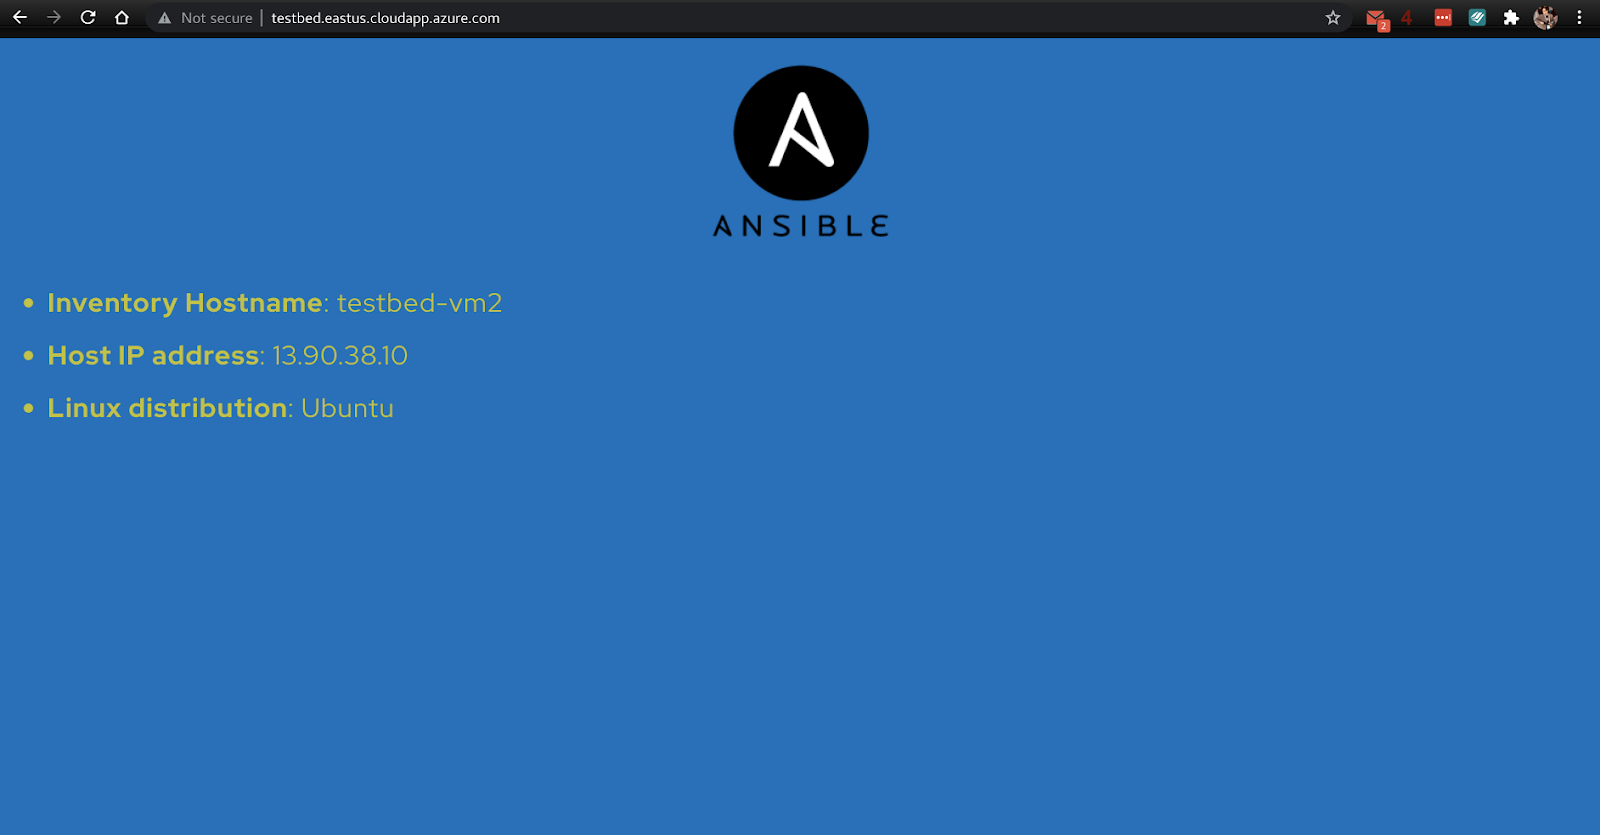
For reliability, we use an Azure Load Balancer to distribute traffic evenly among the backend virtual machines. By default, you can access the web site at http://testbed.eastus.cloudapp.azure.com/. You have the option to customize this URL by adjusting the variable prefix, which is initially set to “testbed”. This URL will direct you to one of the backend VMs.
VM 1
VM 2
Deleting the resources
To delete all resources, run the job template with the variable delete set to true.
Playbook details
The roles folder contains tasks for creating or deleting VMs and load balancers in both Azure and AWS, as well as installing and configuring software on the instances.

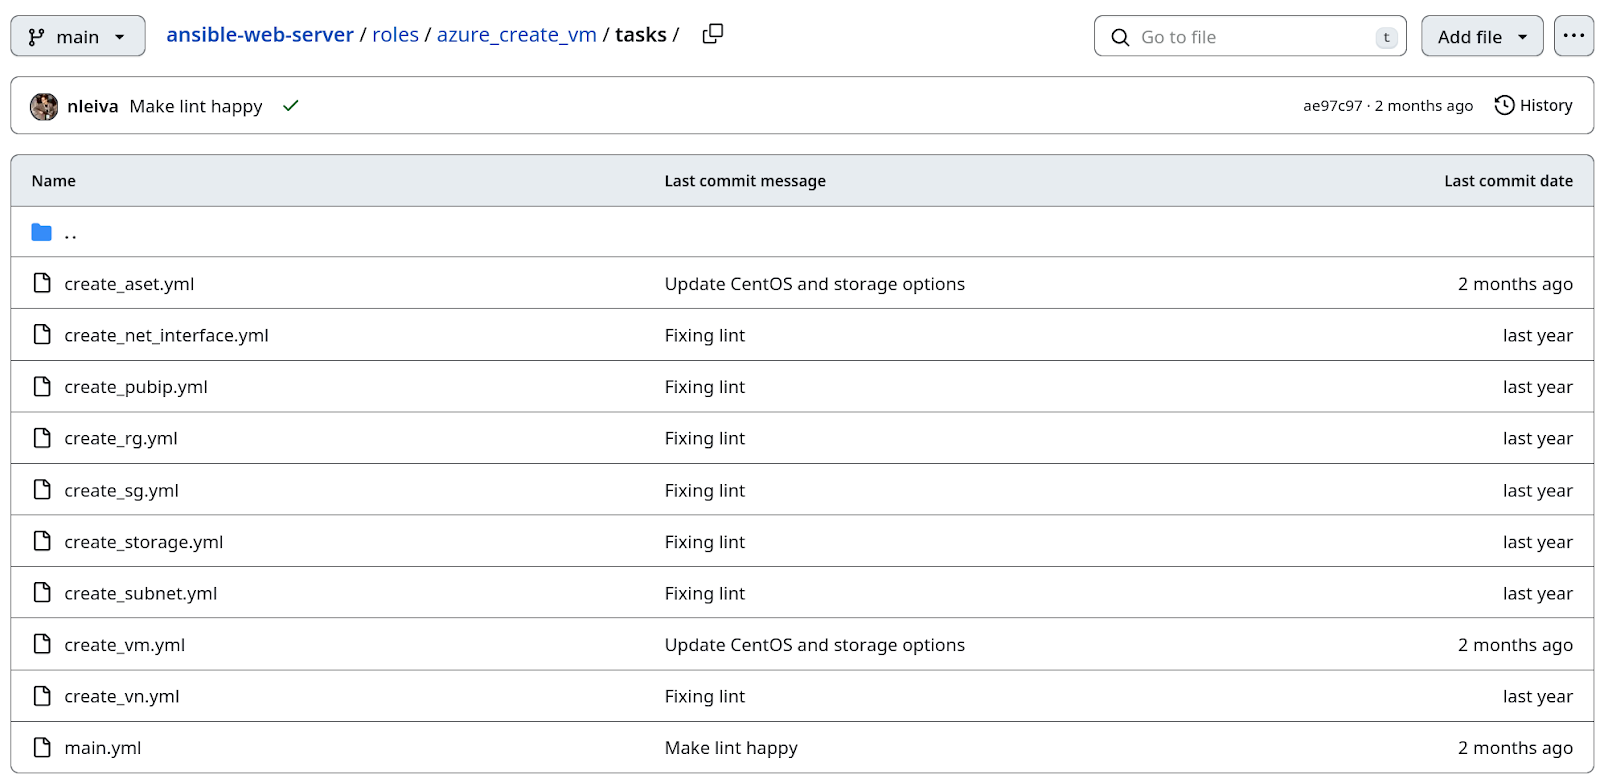
For instance, azure_create_vm provides a comprehensive list of tasks for creating the specified number of VMs. This includes all the logical resources explained in the target setup section of this post.
Each task in the playbook utilizes an Ansible module that is specifically designed to handle a particular resource. For instance, here is an example of how to create a virtual network (VNET) on Azure using Ansible. This is the content of the create_vn.yml file.
– name: Create Virtual Network “VNET NAME”
azure.azcollection.azure_rm_virtualnetwork:
name: “VNET NAME”
resource_group: “RESOURCE GROUP NAME”
address_prefixes_cidr:
– “172.16.0.0/16”
tags:
Environment: “OPTIONAL”
Conclusions
With just a few concise Ansible tasks, you can consistently provision the cloud infrastructure and configure the software you need to deploy a website in a matter of a couple of minutes.
I hope this example motivates you to create your own version of it to deploy your applications.
Resources:
Where do I go next?
Check out these resources to learn more:
- Check out the following YouTube videos:
- This IDC spotlight sponsored by Red Hat: Cloud automation delivers business value, Doc #US49289622, June 2022
- Red Hat Ansible Interactive Labs: https://red.ht/ansible_labs
![]()
Originally posted on Ansible Blog
Author: Nicolas Leiva